

Welcome to the Chicago area kitchen of Lonesome Road Studio. Sure, Lonesome Road Studio is the home of original art belt buckles for men and women, and one-of-a-kind pure silver jewelry. But did you know that we love spending time in our kitchen and country garden? Fire up a nice natural hardwood grill, spice things up, enjoy a cold beverage and settle in for some tasty reading...
Wednesday, July 24, 2013
Thursday, April 11, 2013
Gotta whole lotta onions

Unlike last year's March temperatures in the 80's, spring 2013 has arrived a little later. March temperatures were mostly below average, and this year continued the seemingly new northern Illinois tradition of winter snows falling in March after an uneventful December, January and February. Not cool. Punxsatawney Phil is on "My List."
We finally found a bit of time, good weather and ambition to start the 2013 Lonesome Road garden last weekend though! After a quick rototilling we were able to plant approximately 120 onion plants, four heads of garlic, and toss around a scattering of various lettuce, kale and spinach seeds in a corner.
Half of the onions are my personal favorite, Walla Walla onions from Washington state. And the others are Red Zeppelin red onions. So, we've gotta whole lotta onions. Gotta whole lotta onions.
Also for spring, we're going to attempt to grow russet potatoes again. In the past this has never worked out particularly well, but in loosely following ideas from the Replacing The Grocery Store challenge on the Our Simple Farm blog, we're at least going to give it another try. We do eat lots of potatoes, especially in the summer when they can just be grilled along with the rest of dinner! And I usually try to prepare a few extras on the weekends so we can let them cool, refrigerate them, and slice or chop and make our own home fries for breakfast the next morning.
So, cross your fingers for our potatoes and be on the lookout for potentially lots of posts with red onion recipes. Because we've gotta a whole lotta onions.
Wednesday, February 20, 2013
Great Expectations - The 2013 Garden
Or, trying my best to (somewhat)
replace the grocery store.

During the last few weeks I've become interested in an idea that I discovered on the Our Simple Farm blog. The concept is simple enough - replacing the grocery store with your own home-grown, homemade items.
As prices continue to go up on food, fuel, nearly everything, the idea of saving money on groceries has become extremely appealing. And, living on a gravel road outside of a prison town certainly has its good points, but the evil necessity of driving at least 20 minutes to do even the simplest things can become such a frustrating timewaster, not to mention gas.
So, I've been noting some of the ideas and plans posted on Our Simple Farm - up until The Math Part (cue scary music). For a couple of reasons, I can't really compute how much of each vegetable/fruit we would need to subsist without too many trips to the supermarket. First, much of our garden contains perishable produce like lettuce - not much I can do about preserving lettuce except for eating it in abundance in fresh salads, or sharing with others (if there's a way to use dehydrated lettuce in something, please post your ideas!). Plus, I have only really had experience with freezing and my only foray into canning has been making pickled things. Also, there is a bit of a time constraint as I own my own business, Lonesome Road Studio (and Lonesome Road West), and summers can be a little hectic with shows, markets, etc. Oh, and I decided that I was going to be making our own soap in my spare time. *wink* Did I mention the guitar that I'm going to learn how to play, too?
So, I will work on what I think is relatively feasible for us and our garden, which is usually freezing some vegetables to use throughout the winter when a taste of the summer garden is so nice. I also put up lots of my amazing homemade pizza sauce made with fresh tomatoes, peppers and herbs from our garden, and I plan to plant some new varieties of herbs this year to dehydrate to replace expensive store-bought jars of herbs with questionable shelf life, and for use in some of those soaps I've been dreaming of creating.
Stay tuned as I periodically update everyone on the garden's progress, and I promise to share more recipes and ideas with everyone, as I hope you will too!


Tuesday, February 19, 2013
Homemade Mac N Cheese
Comfort Food At Its Best

Warm up with homemade macaroni and cheese,
with just a hint of smoky flavor
and a little bite of chipotle peppers.
Well, now I've done it - I can never go back to the foil pouch of orange goo again!
As another kitchen challenge, I tried my hand at making homemade macaroni and cheese. Be warned; you won't want to eat it any other way. It's really fairly easy and doesn't require fancy ingredients (depending on just how fancy your mac and cheese will be) but it does take a little time, as do most things that are worth the extra effort.
Two things to remember to make great homemade macaroni and cheese: start with the best cheese you can get (obviously!) and slightly undercook the macaroni.
For the best cheese, grab a block and start shredding it by hand. No pre-packaged shredded cheese in a bag. It is coated in anti-caking agents and doesn't make the most optimal cheese sauce. Plus, shredding your own cheese is more cost-effective in the long run. For this recipe, I chose an apple and hardwood smoked Gouda cheese, and a sharp chipotle Cheddar cheese. I prefer strong, sharp flavors in macaroni and cheese but the choice of cheese is up to you.

Ingredients:
2 cups dry macaroni noodles
2 tablespoons butter
2 tablespoons flour
1-1/2 cups milk (whole milk, or a very good 2% milk like Oberweis)
1 teaspoon dry mustard (Colman's)
1 egg
1/2 teaspoon salt
freshly ground black pepper to taste
3/4 pound cheese, shredded
Directions:
First, cook the dry macaroni noodles. Most package cooking directions will suggest cooking for 8 to 10 minutes. To get the best results for macaroni and cheese, however, you'll want to cook the macaroni for a little less time, about 7 minutes. Otherwise, you will have mushy macaroni in the finished dish; it has to stand up to combining with the cheese sauce and baking in the oven for about half an hour. So, undercook slightly, drain and rinse with hot water. Set aside.
Beat the egg in a small bowl and set aside.
Next, make a simple roux to begin the cheese sauce. Melt butter in a large saucepan and quickly whisk in the flour until it is completely incorporated. Slowly whisk in the milk and cook, whisking constantly over medium-low heat, until the mixture has thickened. Stir in the dry mustard.
Add the egg by first adding 3 tablespoons of sauce to the beaten egg in the small bowl. Whisk very quickly - this is called tempering the mixture. If you were to add the egg directly to the large pan of sauce, the egg would cook almost immediately and you would have little bits of scrambled egg in your sauce. Not quite the way it's supposed to work!
And why the egg, anyway? The egg mainly serves as a binding ingredient, allowing you to more neatly cut your mac and cheese into squares. If you don't mind your mac and cheese spilling out everywhere in freeform cheesy glory on your plate, you can omit the egg.
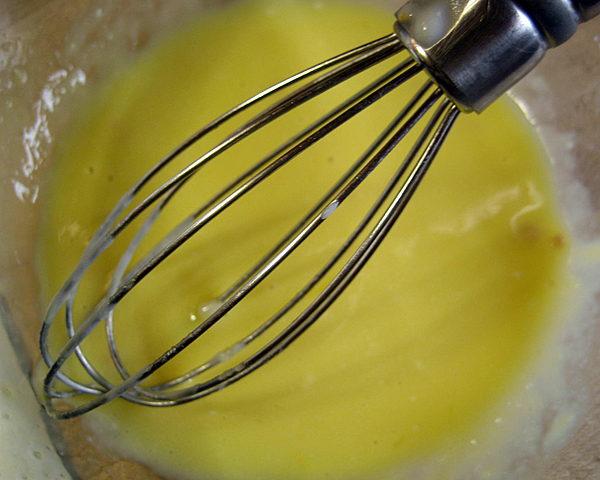
Above: tempering the egg.
When the tempered egg mixture is nice and smooth, add it to the sauce. Stir in salt and freshly ground pepper. And then... stir in all that glorious shredded cheese and keep stirring until smooth and totally incorporated in the sauce. Reserve about a half of a cup for sprinkling on top of the mac and cheese before it goes in the oven.
Butter a 2 to 2.2 quart baking dish. Pour the macaroni and cheese into the dish and top with the reserved shredded cheese. You can also use dried bread crumbs or cracker crumbs, but I really just like lots of extra cheese on top. It will become nicely browned after baking in the oven!
Bake the macaroni and cheese uncovered in a 350 degree oven for about 25 minutes, then turn up the oven temperature to 375 degrees for 5 to 10 minutes to lightly brown the shredded cheese topping. It's finished when everything is bubbling hot!
Approximately 6 servings.


Cheesy detail of "Better With Age" by Lonesome Road Gallery.
Subscribe to:
Posts (Atom)